Apart from offering pre-defined wellness activities, Wellness360 also allows the custom creation of completely new wellness activities to ensure users can make the best use of the wellness programs.
After the Activity is created, it will be listed on the 'Activities' page.

Across each activity record are options to - Preview, Edit, Delete, Assign Participants, and Download report of the completed activity.
Program administrators can perform any of these actions easily from the Activities page.
Preview Activity
The Preview action allows viewing all the details of the selected activity. Right from a short description to the action you need to take, activity type, points, and other details, the preview window gives a clue about the activity.
1. Log into the admin portal. Navigate to the Activities page from the Program section in the left menu panel.
2. Click on the ‘Preview Activity’ icon across the specific wellness activity record.

3. A pop-up window with all the details of the activity will be displayed here.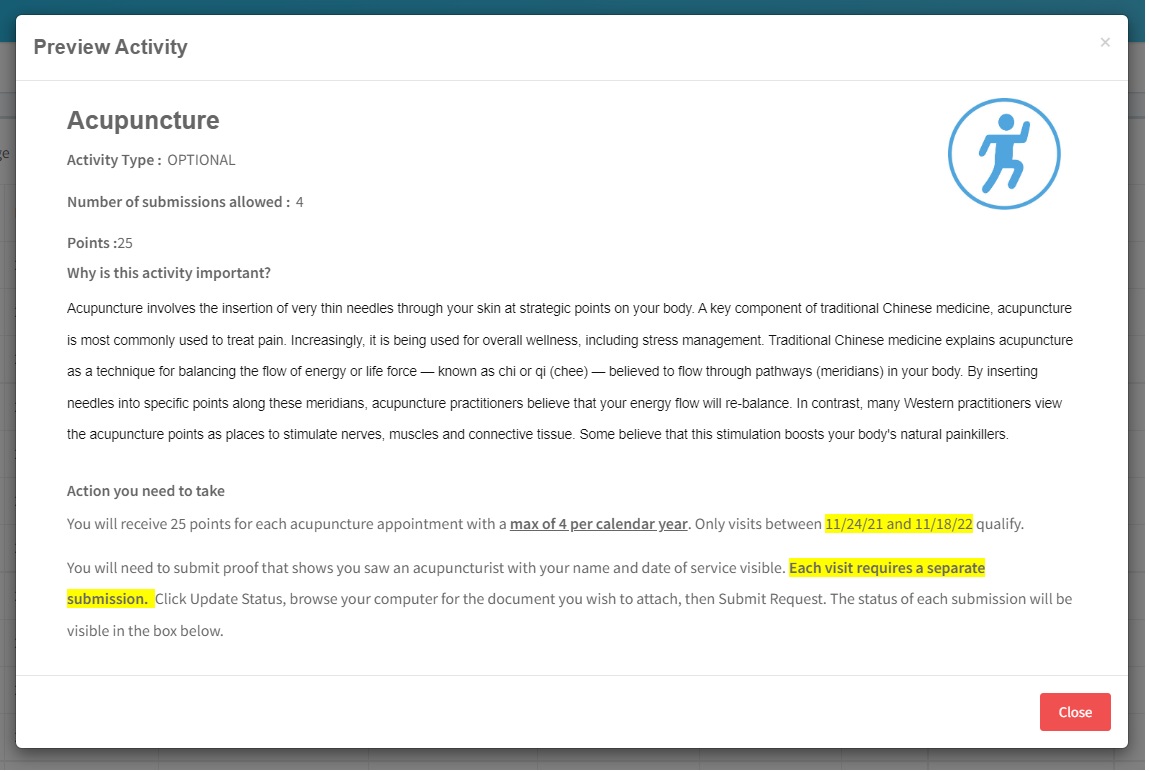
Edit Activity
The Edit action allows the administrator to edit and make changes to the selected activity details.
1. Log into the admin portal. Navigate to the Activities page from the Program section in the left menu panel.
2. Click on the ‘Edit Activity’ icon across the specific wellness activity record.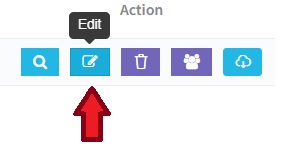
3. You will be redirected to the Template Activity page where you can edit and make all the needed changes to the wellness activity.

4. After making the required changes, click on ‘Create Activity.’

Delete Activity
The Delete action allows the administrator to delete the selected activity and its details.
1. Log into the admin portal. Navigate to the Activities page from the Program section in the left menu panel.
2. Click on the ‘Delete Activity’ icon across the specific wellness activity record.

3. A confirmation message will be displayed. Confirm the delete action if the activity is to be deleted.
Assign Participants
Certain activities need to be assigned to specific population groups only. For example, health screening activities like mammograms must be assigned to female users and prostate exams for male users. At such times, the administrators can create separate Distribution Lists accordingly and assign the participants for the specific activity. Similarly, different distribution lists can be created based on age, gender, lifestyle habits, health issues, or any other parameters. Likewise, a common distribution list can contain the details of all the participants. Make sure the lists are saved with the right name to make it easier while choosing the participants for the activity.
Click here to know more about Distribution Lists
1. Log into the admin portal. Navigate to the Activities page from the Program section in the left menu panel.
2. Click on the ‘Assign Participants’ icon across the specific wellness activity record.
3. A pop-up window with all the Wellness Program Distribution Lists will be displayed.

4. Choose the specific distribution list and click on ‘Save.’
Was this article helpful?
That’s Great!
Thank you for your feedback
Sorry! We couldn't be helpful
Thank you for your feedback
Feedback sent
We appreciate your effort and will try to fix the article